Use Case: Approve/Reject Vacation Requests and PTO
This use case demonstrates how to manage team vacation requests by setting up an approval workflow in a SharePoint list and accessing it directly through Virto Calendar.
Steps to Enable Vacation Request Approvals:#
- Set Up Content Approval in SharePoint List.
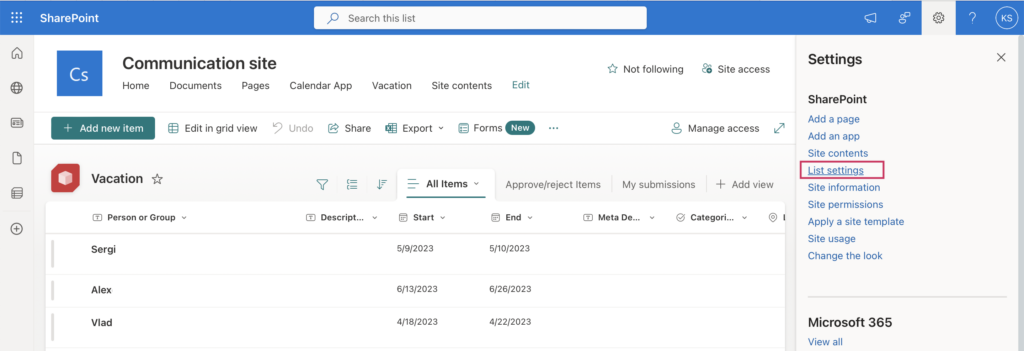
- Open your Vacation List.
- Click the cog icon (top-right corner) and select List settings.
- Go to Versioning settings.
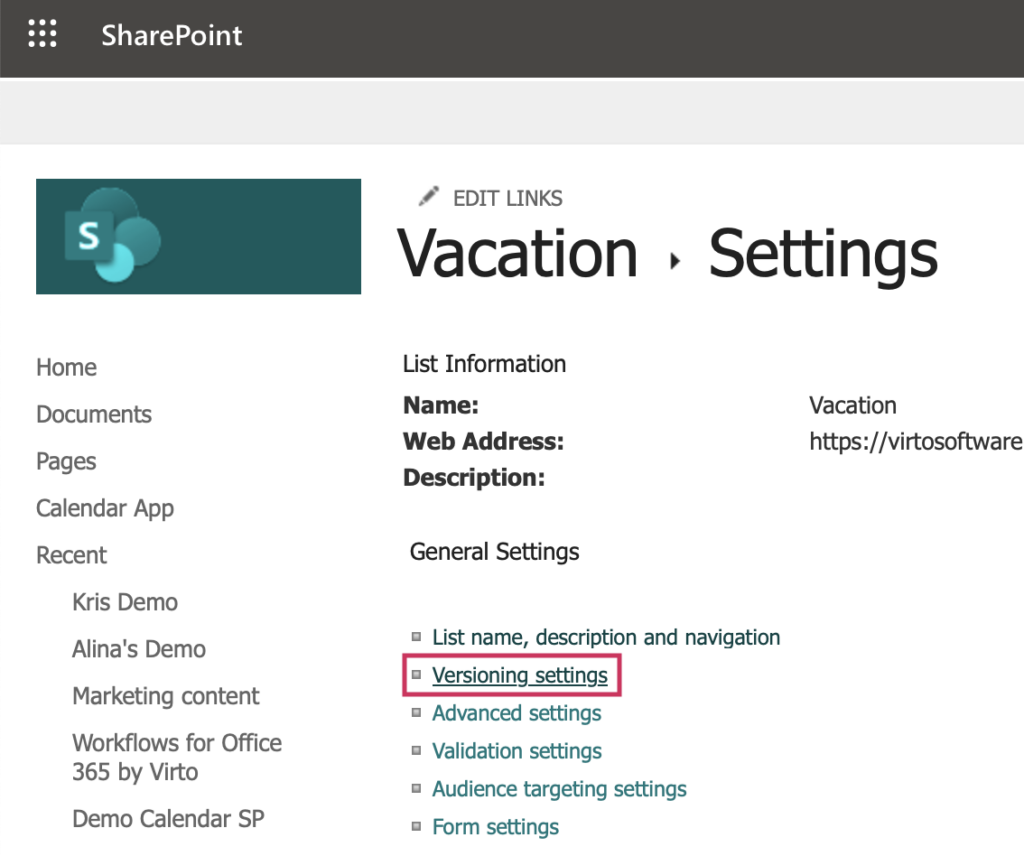
- Enable Content approval by selecting Yes.

- Choose who can view draft items and click OK.

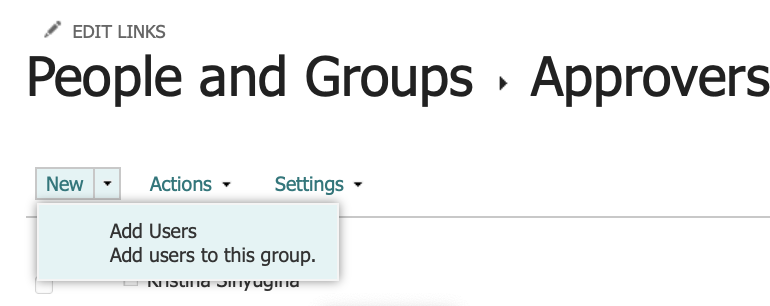
- Create an Approvers Group:
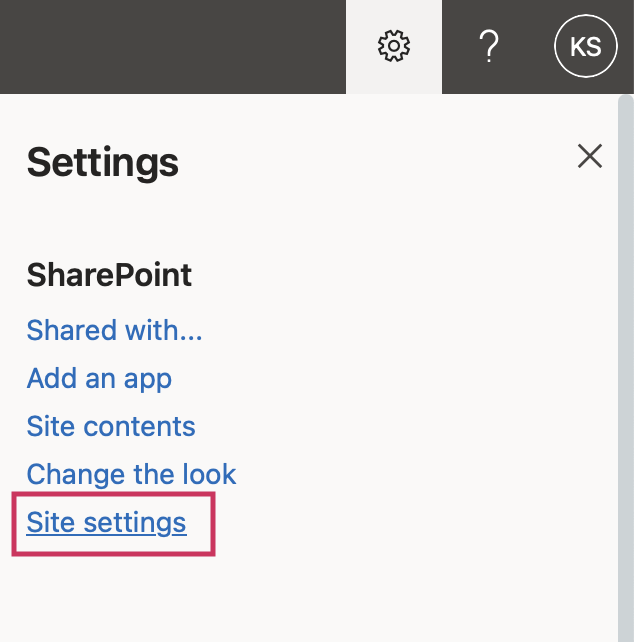
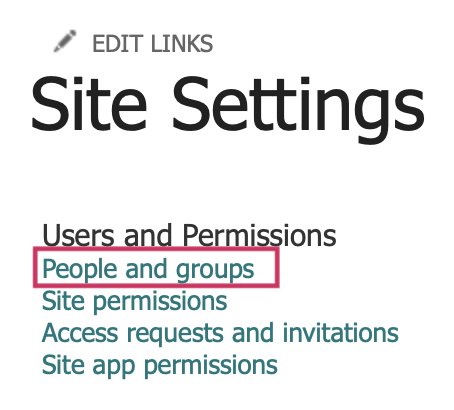
- Navigate to Site settings via the cog icon.
- Under Users and Permissions, select People and groups.
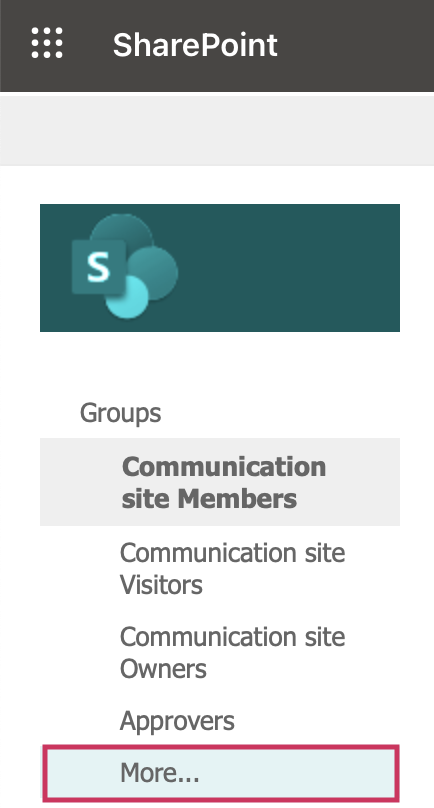
- Click More… in the left-hand menu under Groups.
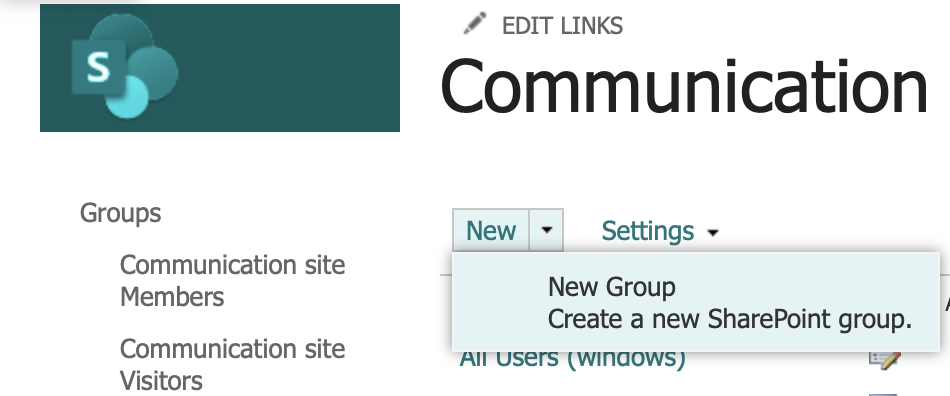
- Select New → New group.
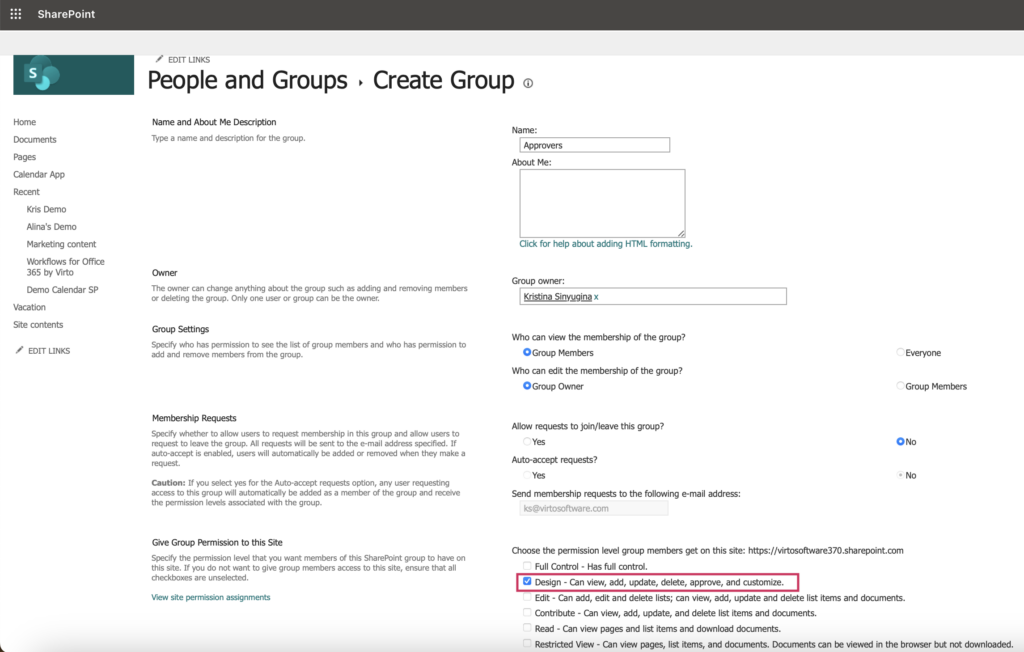
- Enter a group name and assign the Design permission level (includes “Approve”).
- Add users to the group by selecting New → Add Users
- Find the users, and click Share.
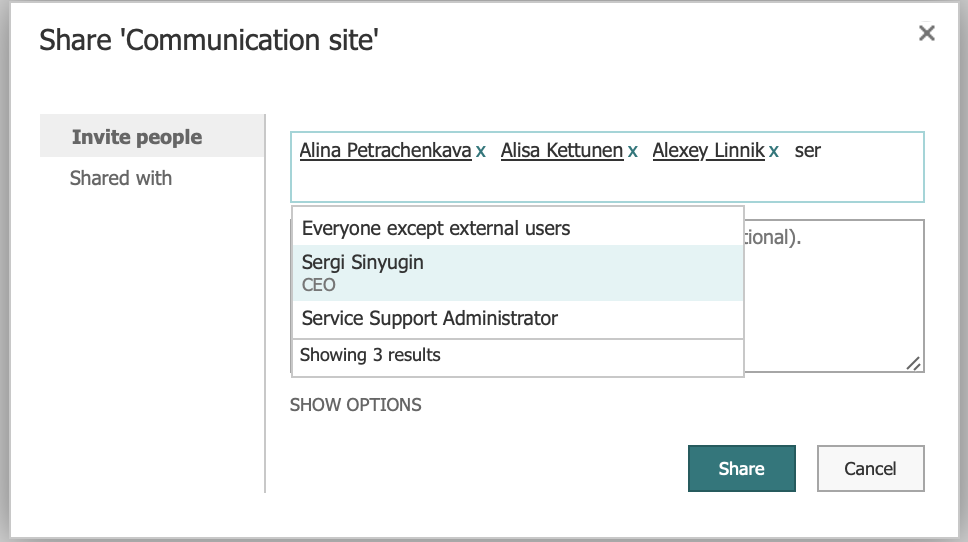
- Now you have a list of uses who can approve/reject vacation requests:

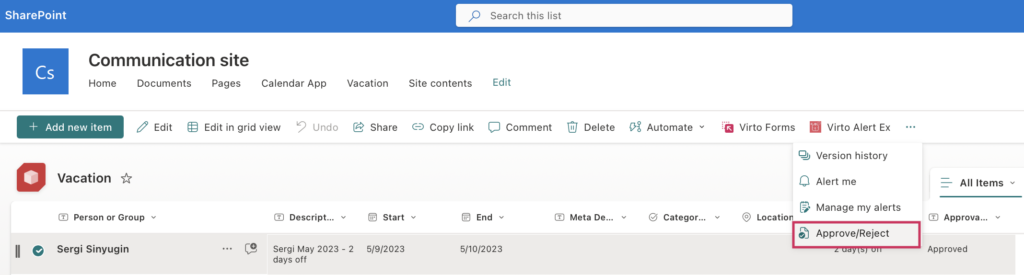
Approve/Reject Requests in SharePoint:
- Open the Vacation List.
- Select a vacation request.
- Click the Approve/Reject button on the ribbon.
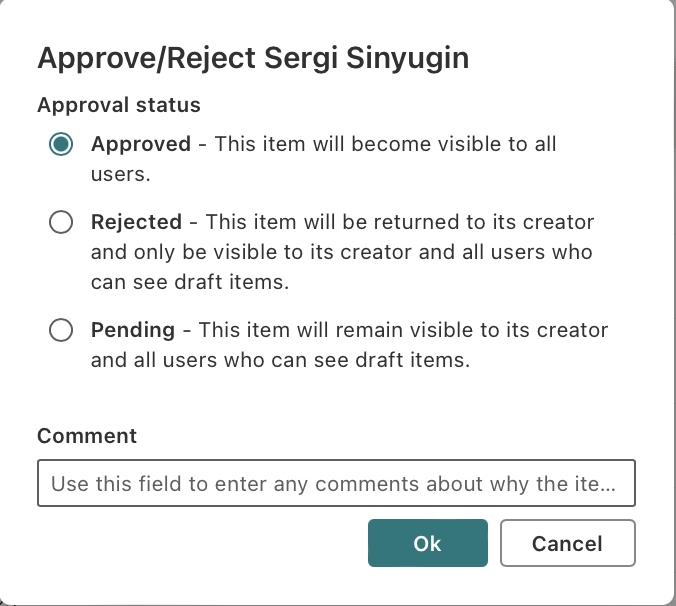
In the dialog window, update the Approval Status as needed.
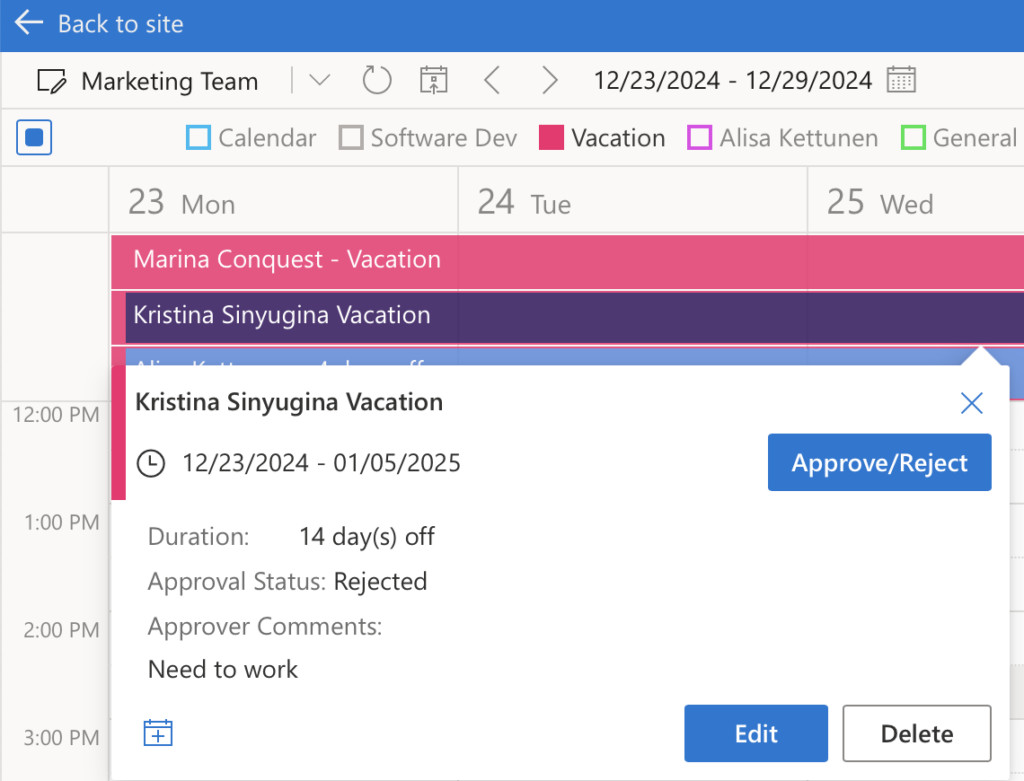
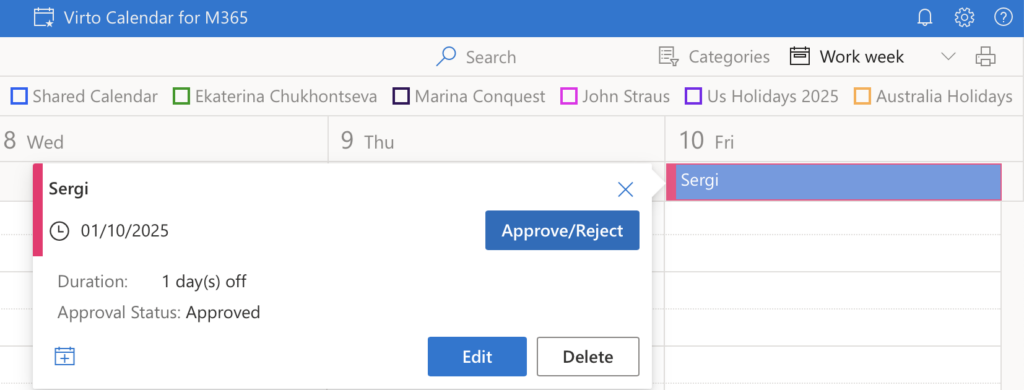
The same way approval is now available in Virto Calendar:
- Open your Virto Calendar app.
- Click on a vacation event in the calendar.
- Use the Approve/Reject button to update the approval status directly within the calendar.
Color-Code Vacation Calendar by Approval Status:#
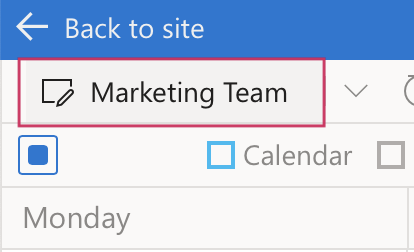
- Click the calendar name (top-left corner).
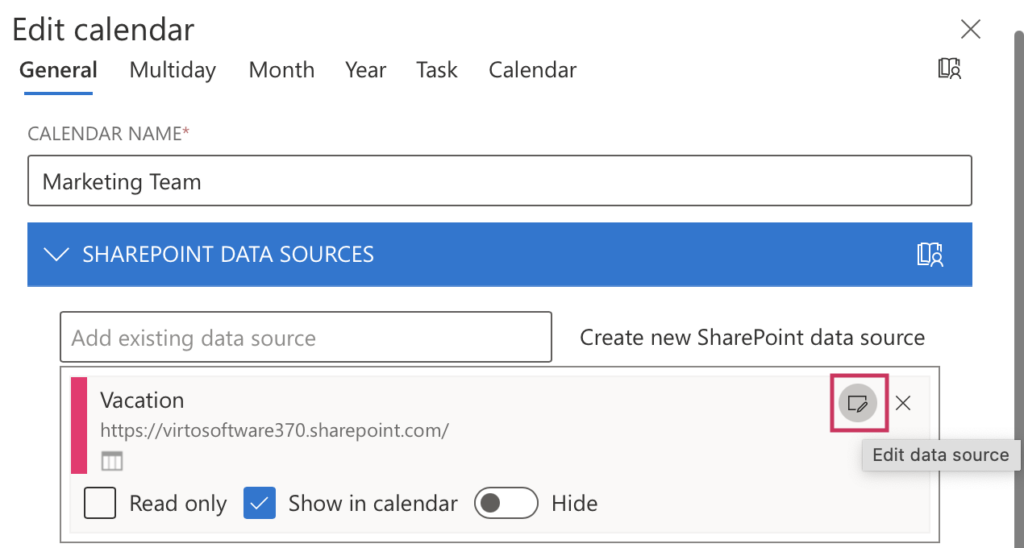
- Open General settings → Edit data source.
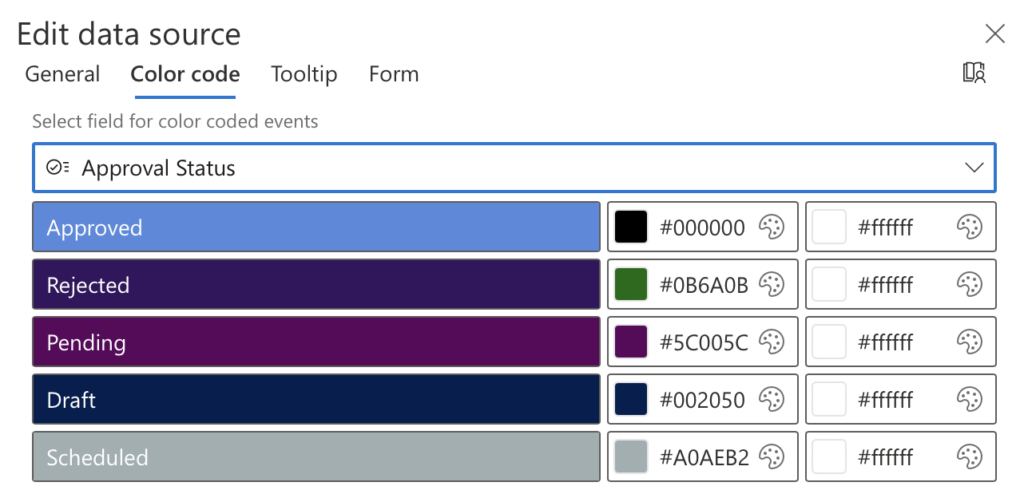
- Go to the Color-code tab:
- Select Approval status in the drop-down menu.
- Assign colors to different statuses.
- Go to the Tooltip tab. Add Approval status and Approver comments to display in the tooltip for your convenience.
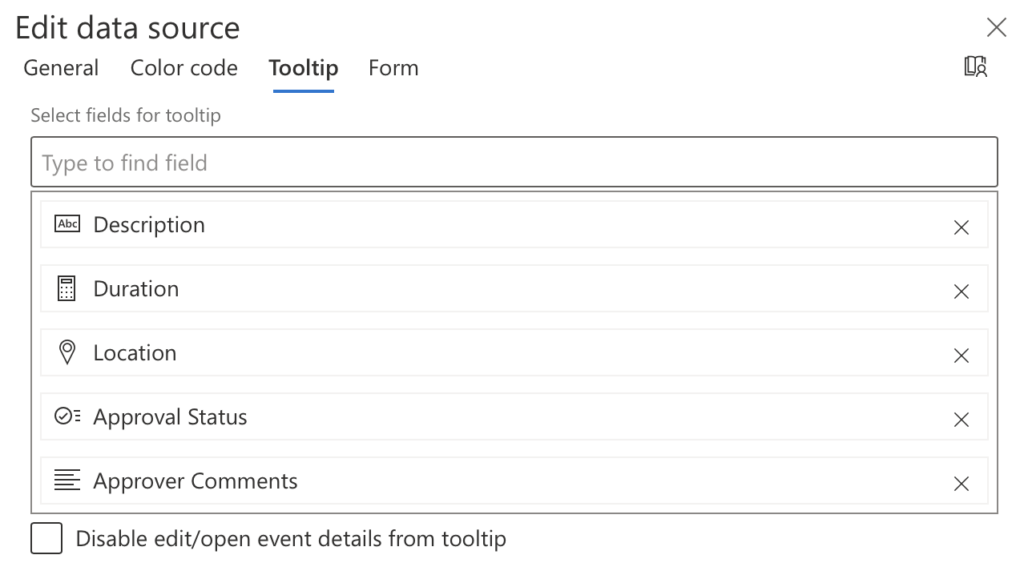
Here’s an example of a tooltip showing the approval status and comments: